

How to Uninstall PSS Software Suite
Need to remove PSS Software Suite from a computer? Fortunately, there are no special uninstall procedures required.
PSS Software Suite is installed as a standard Windows program and can be removed using the normal Windows uninstall process.
This guide walks through the process using Windows 11.
Step 1: Open Windows Settings
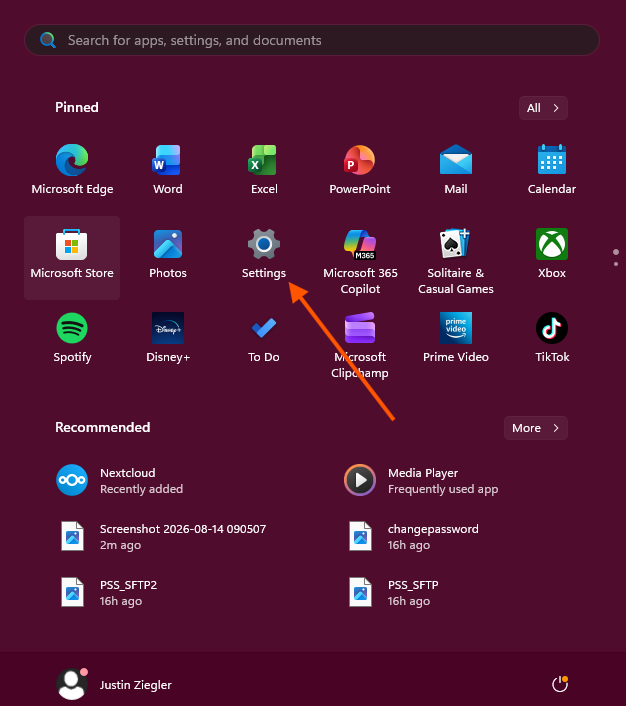
Click the Start button and select Settings.
You can also press Windows + I on your keyboard to open Settings directly.
Step 2: Open Installed Apps
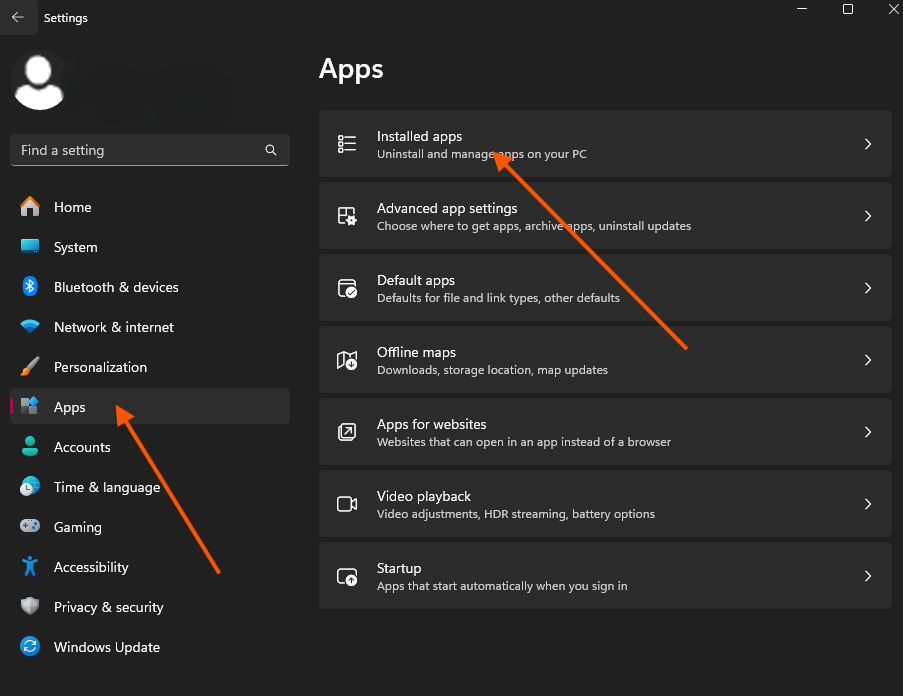
From Windows Settings, select:
Apps → Installed apps
This will display the applications currently installed on the computer.
Step 3: Find PSS Software Suite
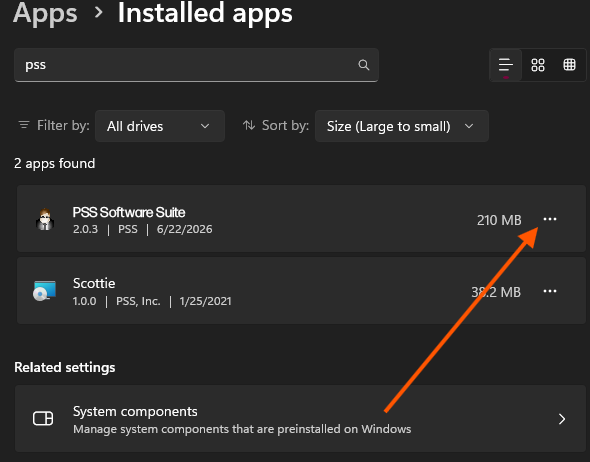
Scroll through the list or use the search field to locate:
PSS Software Suite
Once you find it, click the three-dot menu (⋯) next to the program.
Select:
Uninstall
Step 4: Confirm the Uninstall
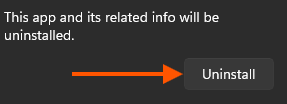
Windows may ask you to confirm that you want to remove the program.
Select Uninstall again and follow any additional prompts that appear.
Once the process is complete, PSS Software Suite will be removed from the computer.
Can’t Find PSS Software Suite?
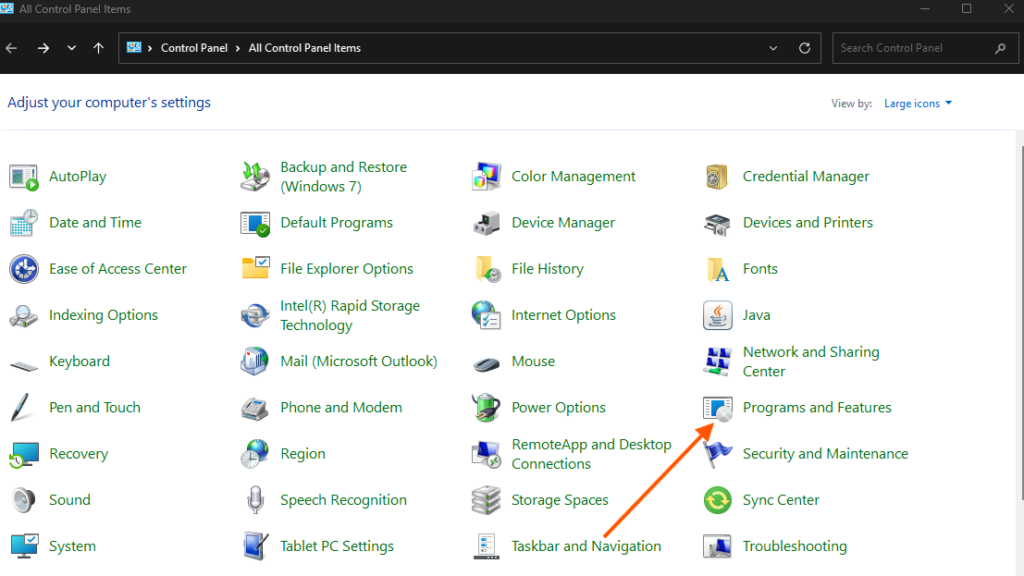
If PSS Software Suite does not appear under Installed apps, you can also use the traditional Windows Control Panel.
Search Windows for:
Control Panel
Then navigate to:
Programs → Programs and Features
Locate PSS Software Suite, select it, and choose Uninstall or Uninstall/Change.
Having Trouble Uninstalling?
If Windows will not complete the uninstall, restart the computer and try again.
Microsoft also provides troubleshooting options for programs that cannot be properly installed, updated, or removed.
If you still need assistance, PSS can connect remotely and help troubleshoot the installation.